Pressed flower projects are a wonderful way to introduce children to the beauty of nature and the joy of crafting. These simple and safe activities promote creativity and learning, making them perfect for parents to enjoy with their kids. Here are some easy pressed flower projects that you can do with your children.
Getting Started with Pressed Flowers
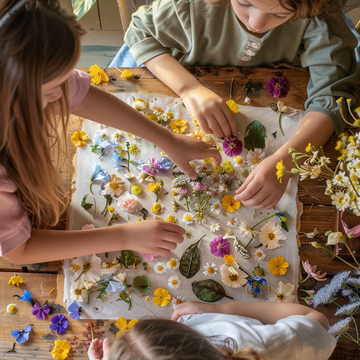
To begin, you’ll need to gather and press some flowers. Choose colorful, flat flowers like pansies, daisies, and violets. Place them between the pages of a heavy book or use a flower press. Leave them for about a week until they are completely dry and flat. Once you have your pressed flowers ready, you can start crafting!
Project 1: Pressed Flower Bookmarks
Materials Needed:
- Pressed flowers
- Blank bookmarks or sturdy paper cut into bookmark shapes
- Clear contact paper or laminating sheets
- Glue
- Scissors
- Ribbon (optional)
Steps:
- Arrange the pressed flowers on the blank bookmark.
- Glue the flowers in place.
- Cover the bookmark with clear contact paper or laminate it to protect the flowers.
- Trim any excess contact paper or laminate.
- Punch a hole at the top and tie a ribbon through it for added decoration.
This project helps children create personalized bookmarks that they can use or give as gifts.
Project 2: Pressed Flower Cards
Materials Needed:
- Pressed flowers
- Blank cards or card stock
- Glue
- Clear-drying sealer (optional)
Steps:
- Arrange the pressed flowers on the front of the card.
- Glue the flowers in place.
- For added protection, apply a clear-drying sealer over the flowers.
- Let the card dry completely before using.
Creating pressed flower cards allows kids to make beautiful, handmade greeting cards for friends and family.
Project 3: Pressed Flower Sun Catchers
Materials Needed:
- Pressed flowers
- Clear contact paper
- Scissors
- Ribbon or string
Steps:
- Cut two pieces of clear contact paper to the desired size of the sun catcher.
- Arrange the pressed flowers on one piece of contact paper.
- Carefully place the second piece of contact paper on top, sealing the flowers inside.
- Trim the edges to create a neat shape.
- Punch a hole at the top and thread a ribbon or string through it.
- Hang the sun catcher in a sunny window to enjoy the colorful display.
Sun catchers are a great way for kids to explore color and light while creating something beautiful for their home.
Project 4: Pressed Flower Frames
Materials Needed:
- Pressed flowers
- Picture frame with glass
- Card stock or paper for the background
- Glue
Steps:
- Remove the back and glass from the picture frame.
- Cut the card stock or paper to fit the frame.
- Arrange the pressed flowers on the card stock and glue them in place.
- Allow the glue to dry completely.
- Place the decorated card stock and the glass back into the frame.
- Secure the back of the frame.
Pressed flower frames make lovely decorations and can be customized with different flower arrangements.
Project 5: Pressed Flower Magnets
Materials Needed:
- Pressed flowers
- Clear glass cabochons or flat marbles
- Magnets
- Glue
- Clear-drying sealer (optional)
Steps:
- Arrange the pressed flowers on the flat side of the cabochon or marble.
- Glue the flowers in place and allow to dry.
- Apply a clear-drying sealer if desired for extra protection.
- Glue a magnet to the back of the cabochon or marble.
- Let everything dry completely before using.
Pressed flower magnets are a fun and functional way to display your child’s creativity on the refrigerator.


