At aZenera, we envision a world where creativity and craftsmanship are accessible to everyone.

  1. Bring the needle up through the fabric at the starting point.
  2. Insert the needle back through the fabric, leaving a small loop.
  3. Bring the needle up through that loop, inserting it from the direction of the starting point.
  4. Pull all the thread to create a knot, ensuring that all knots are on the middle line.

Uses: This stitch is great for creating loops and raised textures, adding dimension to embroidery.
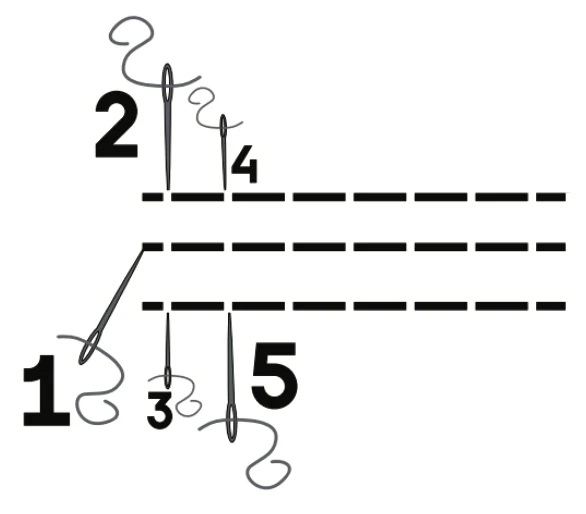
Loop Stitch

Watch All Youtube Video Tutorials for AZD200 Embroidery Kit >

Visit Our Blog

From Kit to Keepsake: How to Make Your First Embroidery Piece Extra Meaningful

From Kit to Keepsake: How to Make Your First Embroidery Piece Extra Meaningful

Read more
Crafting with Kids: Educational Benefits of DIY Projects

Crafting with Kids: Educational Benefits of DIY Projects

Read more
How to Preserve Spring Flowers: 5 Pressing Techniques for Crafting

How to Preserve Spring Flowers: 5 Pressing Techniques for Crafting

Read more
Embroidery for Mindfulness and Meditation: How Slowing Down Can Stitch You Back Together

Embroidery for Mindfulness and Meditation: How Slowing Down Can Stitch You Back Together

Read more
Visit Blog