Creating themed sets of bookmarks with pressed flowers can turn a simple craft project into a delightful storytelling experience. These bookmarks can make perfect gifts or beautiful additions to your personal collection. Here's a guide on how to create sets of bookmarks that tell a story or follow a theme.
Choosing Your Theme
Start by deciding on a theme for your bookmark set. Themes can be based on seasons, favorite books, nature, emotions, or even personal memories. The theme will guide your selection of flowers and the design of each bookmark.
Selecting Flowers
Choose flowers that fit your theme. For example, if your theme is seasons, you might select spring blooms like tulips and daffodils, summer flowers like sunflowers and daisies, autumn leaves, and winter evergreens. If your theme is based on a favorite book, choose flowers that represent key elements or characters from the story.
Preparing Flowers
Press your flowers to ensure they are flat and dry. Place them between the pages of a heavy book or use a flower press. Leave them for a week or more until they are completely dry. This will preserve their color and shape.
Designing Your Bookmarks
Layout: Arrange your flowers on the bookmark sheets before gluing them down. Experiment with different layouts to see what looks best.
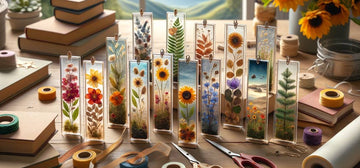
Story Elements: Think about how each bookmark can represent a part of your theme or story. For instance, in a nature-themed set, one bookmark might feature a sunny meadow while another depicts a forest scene.
Consistent Style: Keep a consistent style across all bookmarks in the set. This can be achieved through the use of similar colors, patterns, or types of flowers.
Adding Details
Quotes and Text: Add quotes or text to your bookmarks to enhance the storytelling aspect. Use a fine-tip pen to write directly on the bookmark or on a piece of decorative paper that you can glue onto the bookmark.
Embellishments: Add small embellishments like glitter, sequins, or stickers that match your theme. Be careful not to overpower the flowers with too many additional elements.
Assembling Your Bookmarks
Gluing Flowers: Use clear-drying glue to attach the flowers to the bookmark. Apply a thin layer of glue to avoid wrinkles and bubbles.
Protecting the Design: Protect your designs by placing another layer of transparent plastic over the flowers or by laminating the bookmarks. This will ensure that the flowers stay in place and remain vibrant over time.
Creating a Cohesive Set
Ensure that each bookmark in the set complements the others. Arrange them in a way that tells a story or clearly represents your chosen theme. This cohesiveness will make the set more appealing and meaningful.
Gift Wrapping and Presentation
If you’re creating these bookmarks as a gift, think about how you will present them. Tie the set together with a ribbon or place them in a decorative envelope or box. Add a personal note explaining the theme and story behind the bookmarks to make the gift even more special.
Themes and Ideas
- Seasons: Represent the four seasons with different flowers and colors.
- Literary Characters: Create bookmarks that depict scenes or characters from your favorite books.
- Nature: Use elements like forests, meadows, mountains, and beaches to create a nature-inspired set.
- Emotions: Convey different emotions through your choice of flowers and colors. For example, red roses for love, yellow daisies for happiness, and blue hydrangeas for calmness.
- Personal Memories: Create a set that represents special memories, like a family vacation, a wedding, or a favorite place.
Enjoying the Process
Creating themed bookmarks with pressed flowers is a rewarding and creative process. It allows you to combine nature’s beauty with personal expression, resulting in unique and meaningful pieces. Whether for personal use or as thoughtful gifts, these bookmarks can capture and convey stories in a beautiful and lasting way. Happy crafting!


