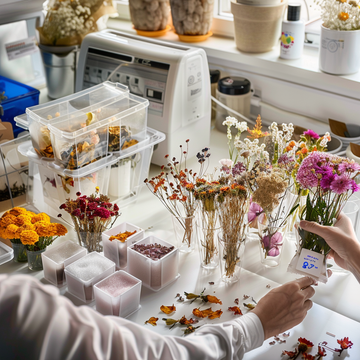
Dried flowers can add a beautiful and lasting touch to your home decor or craft projects. If you’ve been using our DIY Dried Flower Bookmark Kit, you already know the joy of working with these delicate blooms. The kit comes with a set of pressed flowers that are perfect for various creative uses. To keep your creations mold-free and looking their best, follow these practical steps.
Choose the Right Flowers
Start by selecting flowers in good condition. Fresh, healthy flowers dry better and are less likely to develop mold. While the flowers included in your DIY Dried Flower Bookmark Kit are pre-pressed and ready to use, knowing how to choose and dry additional flowers can be helpful for future projects.
Drying Methods
Air Drying:
Air drying is one of the simplest and most effective methods. Gather your flowers into small bunches and tie the stems together with a string. Hang them upside down in a dark, dry, and well-ventilated area. This helps the flowers retain their color and prevents mold. It usually takes about two to three weeks for the flowers to dry completely.
Using Silica Gel:
Silica gel can speed up the drying process and helps maintain the shape and color of the flowers. Place a layer of silica gel in an airtight container, lay the flowers on top, and gently cover them with more silica gel. Seal the container and leave it for a few days. Check periodically until the flowers are completely dry.
Microwave Drying:
For a quicker method, you can use a microwave. Place the flowers in a microwave-safe container with a desiccant like silica gel. Microwave on low power for short intervals, checking frequently. This method can dry flowers in a matter of minutes.
Preventing Mold
Proper Air Circulation:
Ensure the drying area has good air circulation. This helps moisture escape and prevents mold from forming. A fan can be used to improve airflow.
Keep Them Dry:
Moisture is the enemy of dried flowers. Keep them in a dry environment at all times. If you live in a humid area, consider using a dehumidifier in the room where the flowers are stored.
Avoid Plastic:
Store dried flowers in breathable materials like paper or cloth. Plastic bags can trap moisture, leading to mold. If you need to store them for an extended period, use a cardboard box lined with tissue paper.
Storing Dried Flowers
Once your flowers are thoroughly dried, proper storage is crucial. Store them in a cool, dry place away from direct sunlight to prevent fading and moisture buildup. Wrap them in tissue paper or place them in a paper bag to protect them from dust and insects.
Maintenance Tips
Regular Checks:
Periodically check your dried flowers for signs of mold or pests. If you spot any issues, remove the affected flowers immediately to prevent the problem from spreading.
Dusting:
Dust can accumulate on dried flowers, making them look dull. Use a soft brush or a hairdryer on a cool, low setting to gently remove dust.
Spray with Hairspray:
Lightly spraying dried flowers with hairspray can help preserve them and reduce the chances of mold. It creates a protective barrier and keeps the petals intact.
Using Dried Flowers from Your DIY Kit
- With the pressed flowers from your DIY Dried Flower Bookmark Kit, you can create stunning home decor items and gifts. Here are a few ideas:
- Bookmarks: Continue making beautiful, personalized bookmarks with the transparent sheets, tassels, and stickers included in your kit.
- Framed Art: Arrange your dried flowers between two pieces of glass and frame them to create elegant wall art.
- Greeting Cards: Use your dried flowers to add a special touch to homemade cards.
- Gift Tags: Decorate gift tags with dried flowers to make your presents stand out.
- Book Covers: Personalize your journal or notebook covers by gluing dried flowers onto them and sealing with a clear adhesive.
- Photo Frames: Decorate photo frames with dried flowers to add a rustic touch to your memories.
- Candles: Embed dried flowers into candles for a beautiful, nature-inspired look.


